[ Introduction
| The Goal | Latest
News | Image Library ]
Introduction
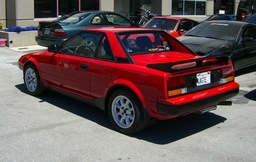
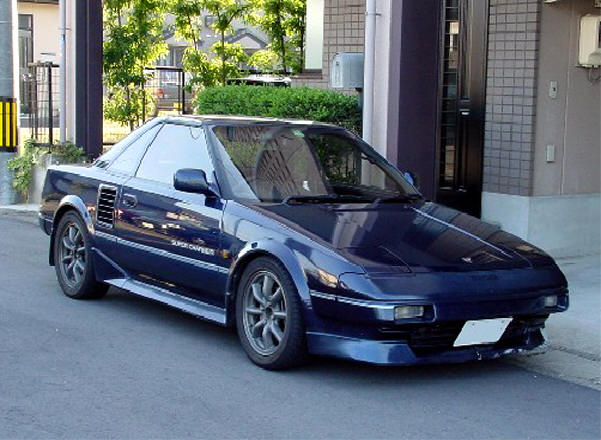
Back when I moved to the United States, my first car was a 1989 MR2. This
was the original body style car, rather angular and very attractive, in
a 80's sort of way! For those that don't know the MR2 is a mid-engined
car, rear wheel drive car. The engine sits right behind your seat and
the car is very light (mine was weighed at 2280 lbs w/ turbo) making for a really fun driving
experience. It feels rather like a big go-kart to drive. No power steering
needed, no ABS, nothing fancy - just a true sports car.
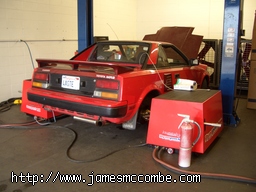
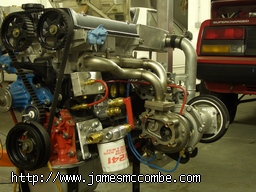
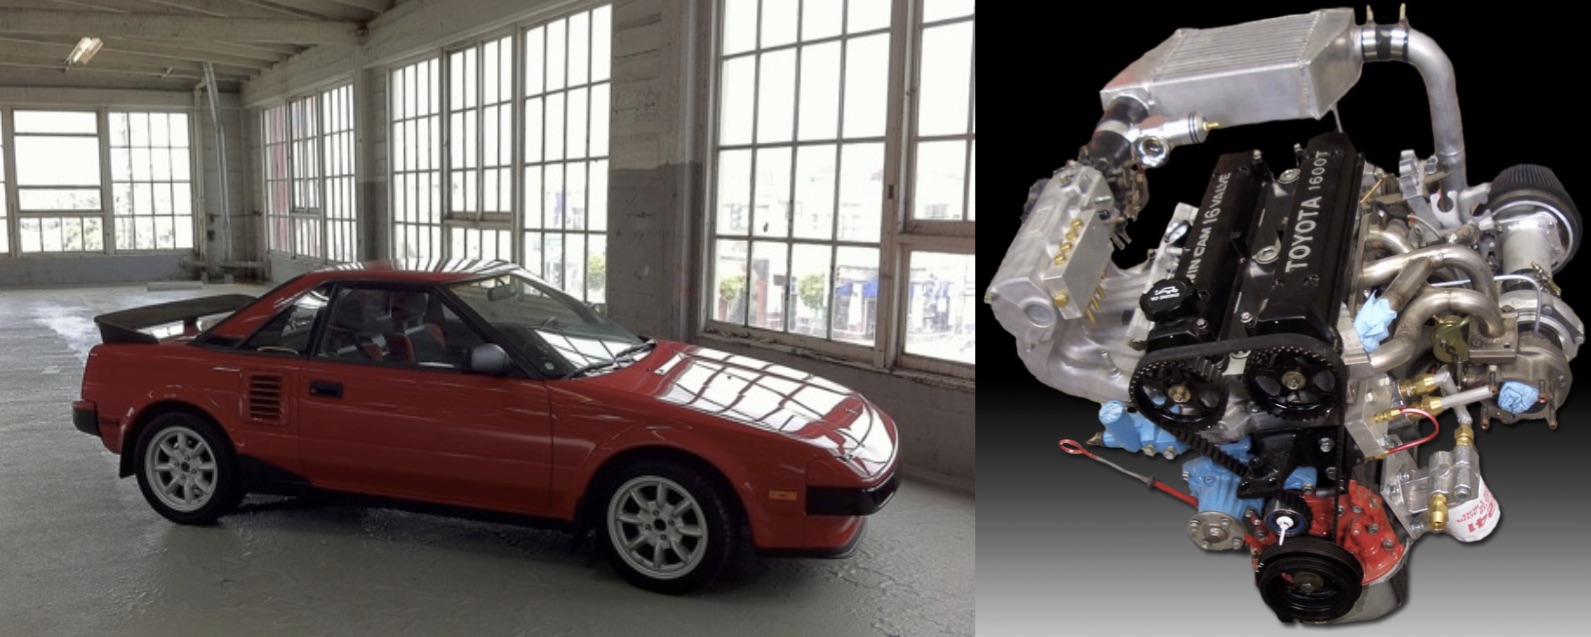
I'm building this turbocharged 4AG motor to put in a 1985 slicktop MR2.
Latest News (Most recent first)
| 24th June, 2006 |
I got my MR2 back from the body shop at last! It looks absolutely amazing - like totally
brand new. William did an incredible job, exceeding even my high expectations. He didn't just
paint the car, he totally restored the exterior in many subtle ways.
Now that I have the car back, I'm going to focus on finishing some small remaining items
on the engine and I will also be fixing up the interior. Shouldn't be too tought since my
interior is mostly fine.

|
| 27th May, 2006 |
Wow - my MR2 is _still_ at the body shop. It recently stopped raining in the bay area
and the time came to do the actual painting, now that all the body work was complete.
Check out the latest on the body work - the main parts of the body are now painted! I
expect to be heading down there next week to get the engine starting again and get the
car ready to leave. I'm sure it will looking great when its done. Now I've got to pony
up that fat cheque :X
|
| 14th January, 2006 |
I found a place near San Jose that has open weighing scales on the street for trucks. I weighed
my MR2:
- Total weight (nobody inside, 1/2 tank of gas): 2280lbs
- Rear weight: 1280lbs
- Front weight: 1000lbs
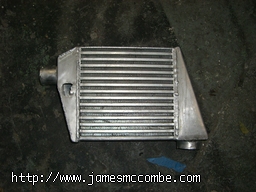
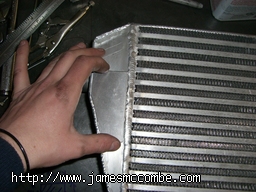
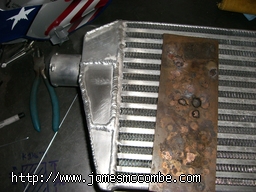
Unfortunately, I had a bit of a problem with my intercooler the other day. The intercooler
had been mounted very close to the frame, in fact, so much that is would touch everytime
the engine would rock back and forth due to torque. This caused the aluminium support
I made to fail, since aluminium fatigues quickly when its bent back and forth.
Interestingly, the bracket didn't break and neither did my welds - in fact, it tore a 1" square
hole out of intercooler! I noticed this because on my drive up the freeway the car felt
laggy and unresponsive. This is obviously because the turbo was blowing massive amounts of
air out the hole, instead of into my throttle body - not good - glad I caught it fast
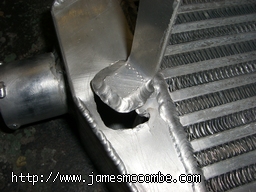
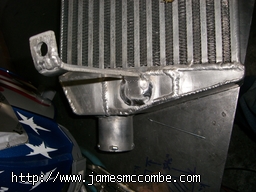
I welded on a patch and rewelded on the bracket - its running normally again.
I also manipulated things so the intercooler is no longer interfering with the car frame.
I'm still concerned just one bracket is not enough to hold the core steady against vibration -
with aluminium, unless the part is held solidly in place
and isn't flexing - it _will_ fail and it won't take that long either. I'm soon going to augment this
with more sophisticated bracketry, triangulate it in some way and try to have the core moving totally
in phase with the motor itself.
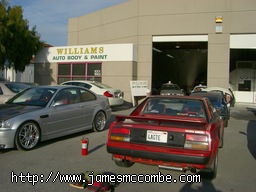
Also, I dropped the car off to Williams Auto Body,
in San Mateo. William has done body work on my 300ZX and many friends cars. He is a master
of body work and takes on many ambitious custom projects. His work is expensive, but you know
you will get quality work and no nonsense. Given the time, research and money I've put into this
car so far, I want to give it beautiful paint and body work - like it went back in time to 1985 ;)
According to William and with his always busy schedule, it will take about 3 months to complete
the job. I will stop by now and again to snap some pictures of the progress. I will miss the
driving thrills for a while, but at least it won't look like a ghetto piece of crap anymore :)
Until next time!
|
| 4th January, 2006 |
Happy new year everyone! The MR2 is still running very well. I now have about
2000 miles on it and haven't had any significant problems.
Last year, I had the Haltech tuned professionally by Paul at Hasselgren Racing Engines in
Berkeley (they build the formula atlantic 4AG's). It was done one of those nifty
chassis dynos. At present, I'm running no boost controller, so its the wastegate
minimum (10PSI). We were able to extract about 180RWHP/180RWTQ at this small boost so
I was very happy. I need to finish my intercooler fan setup, install the boost controller
and then move up to the boost I designed the engine to run at, 17PSI. This should get
me somewhere between 250-300RWHP. Given how quick this car is, I'm not sure how necessary
it is to have this much power, but I'm going to give it a shot.

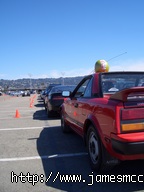
Also, I attended an auto cross at Golden Gate Fields. Car ran great, my driving sucked
though - I need a lot more practise. Also, the crappy stock tires and narrow wheels
are not working well with all this extra power.
My 15"x7" Panasport's arrived! I put Bridgestone S-03's on them. 195/50's up front, 205/50's rear.
They are +36 offset. They fit almost completely flush with the fenders. No rubbing. Hella old school ;)
I have had a small and annoying oil leak that has been hard to track down and I
recently just pulled out my motor again since it appeared to be coming from the rear
mail seal area. Sure enough, the seal itself isn't leaking, but the
gasket between the seal housing and the block appears to be leaking close to where
it mates against the oil pan seal. Hopefully a good cleanup and more careful RTV
application will make it hold up.
|
| 2nd August, 2005 |
Well, almost a week later, and it still runs. I haven't driven it yet since the
brakes and the clutch are not bled and ready.
I pushed the car outside, let it warm upto operating temperature and started
messing with the fuel maps on the Haltech. Of course, this is just off load
tuning. Darn, I can't believe how responsive the throttle is on this thing -
I have the rev limiter set to 5000RPM for break in - I tapped the throttle and it hit
it _immediately_. Sounds like a motorcycle, except with a big sucking sound coming from
around the air filter attached to the turbo. I'm so excited.
I'm going to have it towed via a flatbed truck to my friend Chris' auto repair
place in Berkeley where he is going to make sure the suspension, brakes and
clutch are all safe and ready to go.
I trust myself to build a nice engine but I want another pair of experienced
eyes to overlook the more critical safety aspects of the car before I start
tearing around in this thing.
I've been looking for a long time for a set of nice wheels for this car,
and I think at long last I have found them.
RS Watanabe 15" rims. Unforatunately,
they are quite rare and need to be ordered from Japan.
The other big unfinished part of this car is the nose. About 3 years ago I had
a minor accident where I kinked the first 2" of the frame rail. While I have
all parts to rebuild the nose, I still need to fix the smushed bumper mount. This
will require careful measurement and a long weekend with my TIG welder.
Until next time!
|
| 26th July, 2005 |
darn - I messed up _REALLY_ bad =(
Last night, I was reading over a lot of my 4AG material again to think things over more before
continuing to run my motor. I looked at the oil flow diagram and started to suspect something terrible.
Oil enters from the side of the filter, through the one way rubber diaphragm and comes out
through the hole in the center. I PLUMED IT THE WRONG WAY AROUND!
I quickly ran downstairs and pulled the filter and sure enough, it was full of oil,
but the passage leading to the main gallery of the motor was totally dry..
Here is what the plumbing looked like - remember, THIS IS WRONG:
I had to take a wierd (red) aluminium pipe I made and cut and weld it to go to the other
port on the oil filter bracket, and change the output port also.
I put it all back together and started the motor again
(with an accurate oil pressure gauge - thanks to Chris for that). It fired up and sounded really quiet
and smooth and I'm getting about 70PSI of oil pressure at an idle speed of 1800RPM.
Fortunately, I had only ran the motor before for about 40 seconds before, and it had tons of assembly
lube inside - _hopefully_ this is enough to protect my bearings from damage.
Please - nobody else make this mistake - remember, the oil filter is a one way valve,
input is through the outer ring, output is through the center hole.
|
| 24th July, 2005 |
IT STARTS!!!!! I can't believe it, but it started first time!
Here are a couple of video this exciting occasion, one of me
rambling on about nothing, the other of
me actually starting the engine.
I just finished fabricating a
nice stainless steel exhaust system
and finished hooking everything up. After
that, I filled it up with oil and decided to just disable fuel and let it turn over on the starter, just to
make sure the thing actually rotates. That worked fine!
Then, I went into the Haltech setup and enabled fuel and put the spark plugs back in. I had a map file from
my friend Windsors 4AGTE. Our engines are different, but I would imagine close enough to at least allow
it to idle with his fuel tables.
I decided to try to start without adding coolant - this was intentional - if I found a catastrophic problem,
it would be much less messy to pull out the motor, i.e. I wouldn't have to drain all the coolant (thanks
Michael).
I tried to start, and it _almost_ sounded like it was starting, but not quite. I turned the crank angle
sensor all the way in one direction and tried again. It sounded even better, but still not quite running
on its own. Then, I thought hey - maybe the CAS is off by one tooth, hence making the spark timing too
retarded. I pulled it out and rotated it by one tooth and stuck it back in. Turn the key - and - it
started right away!!
I'm currently so excited I can barely type or think. I have a small oil leak from one of my weird fittings
near the oil cooler and also a small coolant leak near another weird fitting that brings coolant to the
turbo. I need to fix these (should be easy) and then I will continue trying to get the motor upto
normal operating temparature.
There are still no drive shafts - I need to put these in and torque all the bolts on my suspension. Also,
I need to bleed the brake and clutch fluid. After that, I may back it out and try to actually drive
the thing - very, very gently ;=))))))))))))))))))))))
|
| 6th June, 2005 |
Just got finished tearing out the crusty old suspension system, cleaning and powder coating it all.
I went a replaced all four shocks with Tokiko Illumina 5-way adjustables, Eibach springs. I've put on
new urathane bushings all over along with four new ball joints and new tie rod ends. Hopefully the suspension
setup be a nice platform in which to enjoy this motor when its done.
In my process of upgrading the suspension, I found the rear driver side spindle (the part that carries the
wheel bearing) is slightly bent, enough to throw off the camber more than I'd like. I'm going to the
toyota junk yard this weekend to source a replacement spindle and will hopefully have the whole suspension
reassembled next week.
Associated images are here.
|
| 20th May, 2005 |
Well, I've updated the website at last, after a year of saying nothing. I may not have been saying
much on the site, but have been hard at work with the project and its almost nearing completion! Thank
goodness for that since I've now been at this project since 2003 and I'm getting very anxious to actually
see some signs that all my hard work is going to pay off and the engine will actually run.
In the new website design, I have split the project into all different sub-systems and have a separate
page for all of these. Here I will, as I have time, do write ups to give out my advice from my experience
of working on these particular systems, right now, they all just point to the image library.
Have fun!
|
Sub-systems
|
